

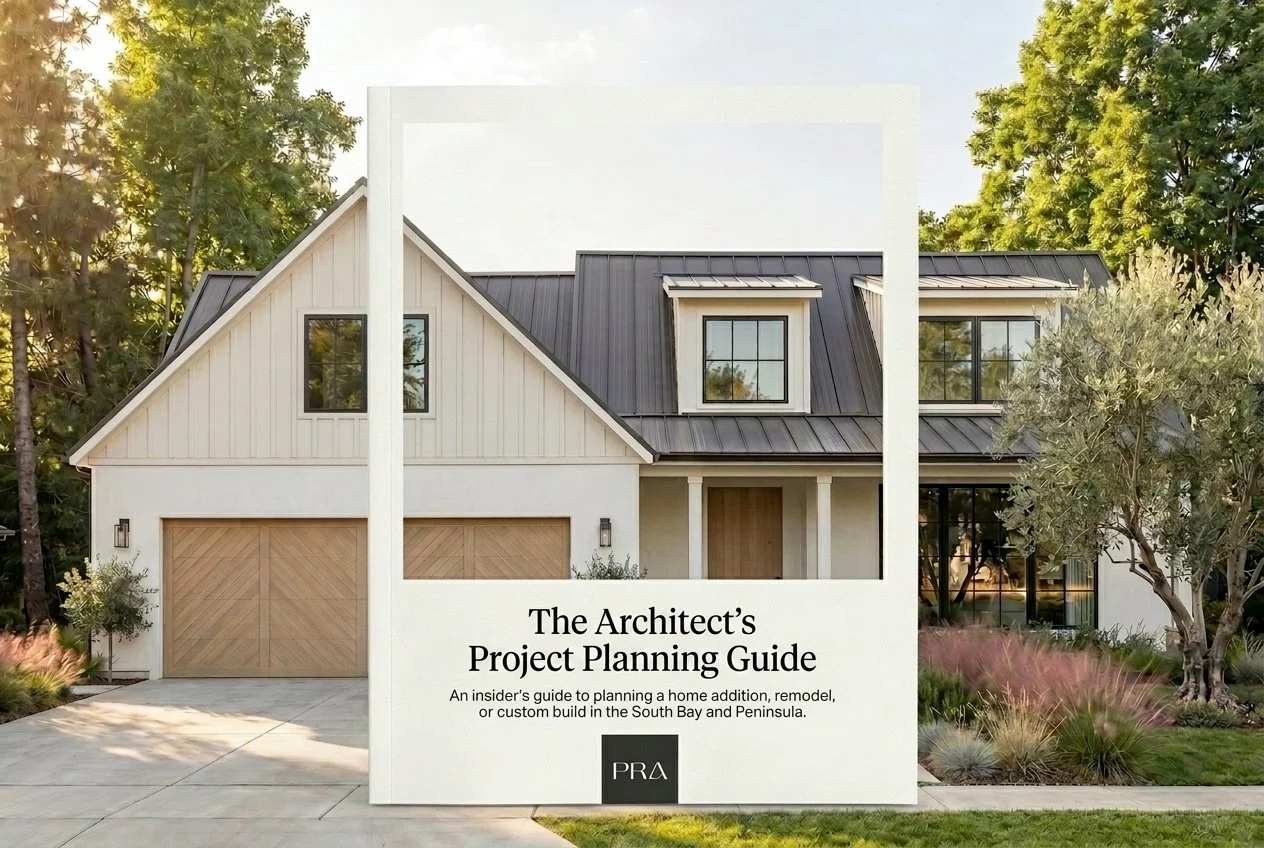
Planning a Home Addition, Remodel, or Custom Build in the South Bay + Peninsula
The Architect’s Complete Guide
Written by Eyal Ravid, CA Licensed Architect C35265. 20 years of practicing in California. Licensed since 2015.
About This Guide
What makes a South Bay or Peninsula home project genuinely difficult has almost nothing to do with the design. The design is the part we can control from day one. What creates cost overruns, permit delays, and full redesigns is everything that happens before the first sketch: the foundation conditions that were never assessed, the permit thresholds that were never calculated, the arborist report that wasn't initiated before site planning began. Most of what goes wrong on these projects is predictable - and most of it is entirely avoidable. We know the patterns because we've navigated them across Cupertino, Saratoga, Los Gatos, Palo Alto, and the Peninsula for years.
This guide covers what we actually evaluate before design begins and what the process looks like when it's done right - and when it isn't. Second story additions, whole-home remodels, and custom builds across the South Bay cost between $300 and $700+ per square foot in 2025 and take 18-26 months from first meeting to occupancy. Most of that range is determined by decisions made in the first two weeks.
Second story additions - structural candidacy, how permit track is determined before design begins, and what we see go wrong on projects where those evaluations are skipped
Whole-home remodels - scope definition before design, the cost of changing decisions at each phase, and what South Bay housing stock actually contains behind the walls
Custom home construction - how site conditions determine what's buildable, and why the delivery model matters more than most homeowners realize
Permitting by city - the three review types and how design decisions made in schematic week one determine which track a project lands in
Cost and timeline - what drives the premium in Saratoga and Los Gatos, and realistic schedules across project types
Written for homeowners planning a significant project in the South Bay and Peninsula who want to understand the real process - not the brochure version.
How to Use This Guide
Different project types trigger different permit pathways in the South Bay and Peninsula, and the right starting point depends on where you are in the decision process. If you're planning a second story addition, start with Part I. Whole-home remodel, go to Part II. Custom home, Part III. Part IV covers the permitting landscape and cost structure.
City-specific permitting process detail - the exact approval paths, trigger thresholds, required submittals, and review timelines - lives on each city's dedicated residential architect page. We link to those throughout. This guide covers what we do with that information: how we design to it, when it changes a project, and what happens when it's missed.
This guide reflects how we approach early-stage projects at Prestin Ravid Architects with understanding constraints first, design second. If you'd prefer to see how we work before reading further, see how we work.
Jump to Section
| Second Story Additions
| Whole-Home Remodels
| Custom Homes
| Permitting by City
| Cost + Timeline
| FAQ

Part I: Second Story Additions
You own a 1960s ranch in Cupertino, the kids have outgrown the bedrooms, and moving doesn't make financial sense. You want a second story. Before we talk about what that looks like, we need to know what's holding up the house - and what the city will require before we draw a single room.
Those two questions - what the foundation can carry, and which permit track the project will land in - determine whether the project is economically viable. In the South Bay's ranch-era housing stock, the answers are almost never what homeowners expect.
What's Under the House: Foundation Conditions and Why They Drive Everything
When we first visit a property for a second story addition, we're not looking at the lot or the street or the existing layout - we're looking at what the structure is sitting on. In Cupertino, Sunnyvale, Campbell, and Mountain View, the dominant housing stock is 1950s-1980s ranch construction on post-and-pier foundations. Those foundations were engineered for single-story loads. They were not designed for what happens when you stack 1,000 square feet of bedrooms, bathrooms, and mechanical systems on top of them.
Adding a second floor introduces lateral and vertical forces the system was never intended to carry. In practice, that typically means new moment frames or shear walls - locations of reinforced structural resistance - before the design conversation can go anywhere meaningful. The structural engineer calculates what's required after we establish the basic floor layout, because the floor layout determines where those walls have to go.
Here's what most homeowners don't anticipate: this isn't purely a cost question. It's a spatial question. If the structural analysis requires shear walls at specific intervals across the first floor, those walls can bisect the open-plan living space the homeowner had in mind. The structural constraint shapes the architecture - which is why discovering it at Design Development, after the floor plan is set, produces a redesign rather than an adjustment. We run this analysis before the first sketch so the design starts from reality, not from an assumption that gets corrected six weeks into design development.
Perimeter stem wall foundations, common in 1940s-1970s construction throughout the South Bay, are more variable. Condition matters more than age - a stem wall in good condition can often accept additional load with targeted reinforcement at point loads, while a cracked or settled wall opens a much longer conversation. Slab-on-grade foundations, widespread from the 1960s through the 1990s, require new concrete footings wherever shear walls or moment frames land. The scope depends on how many locations the structural system needs and what the soil conditions are.
The foundation is not a detail. It is the first design decision.
How the Permit Track Is Decided - Before Design Begins
In Cupertino, Los Gatos, Saratoga, and Palo Alto, the permit track for a second story addition isn't determined by the project type. It's determined by specific design decisions we make in the first two weeks of schematic design - decisions about floor area ratios, massing, setbacks, and program configuration. The same homeowner, the same neighborhood, the same program can land in a six-week permit process or a sixteen-week one depending on what we draw. This is why we evaluate the thresholds before design begins.
The city-specific permitting processes - exactly what each review path requires, how long each takes, what the triggers are, and what the submittals need - live on each city's dedicated residential architect page. What belongs here is how those thresholds shape design decisions and what happens when they're missed.
Cupertino: Two-Story Permit, Residential Design Review, triggers and timelines → Cupertino residential permitting + design review
Los Gatos: A&S Application, DRC process, neighbor opposition mechanism → Los Gatos architecture approval process
Saratoga: Three Design Review paths, story poles, neighbor notification → Saratoga residential design review system
Palo Alto: Individual Review, February 2025 ODS, daylight plane specifics → Palo Alto objective design standards + review process
Cupertino: The 66% Ratio Is a Design Decision, Not a Threshold
In Cupertino, the most consequential early decision on a second story addition isn't about room layout or square footage - it's about the ratio of second-floor area to first-floor area. Projects where the second floor exceeds 66% of the first floor trigger Residential Design Review: a process with a public hearing, design compatibility findings, and a timeline and cost that's meaningfully different from the Two-Story Permit path. That ratio, confirmed in Cupertino's Planning Application Guidelines and in active 2024-2026 Planning Commission records, is not a ceiling. It's a design variable.
In practice, we calculate both options at schematic design. A program that lands at 75% of the first floor can often be reconfigured to 65% through different room arrangements - and that 120 sqft of second-floor area is worth the conversation before any design commitment is made. There's also a second trigger that most plans miss: second-floor walls set between 10 and 15 feet from a side property line trigger Design Review regardless of the floor area ratio. Both are independent triggers. Missing either one at plan check means starting the permit process over in a different track - with design fees already spent and a contractor timeline already committed.
In Cupertino, the ratio is the decision. Everything else follows from it.
Saratoga: Designing to the Effective Envelope
In Saratoga, nearly every significant addition triggers Design Review - the city's residential development standards confirm this for expansions over 50% of existing floor area, second story additions of 100 sqft or more, and all new construction. What matters more than which of the three review paths applies is understanding that the effective buildable envelope in Saratoga is consistently smaller than what the code allows on paper.
Planning staff's qualitative expectations about massing compatibility, material quality, and neighborhood coherence narrow the practical design range below the dimensional limits. Designing to the code maximum in Saratoga means designing something that will need to be revised - typically at the planning comment letter stage, after the application fee has been paid and design time has been spent. We design to the effective envelope from schematic design - the range that will actually move through Design Review efficiently - because that's the version of the project the homeowner actually gets to build.
Designing to the code maximum in Saratoga is designing to a target that will be revised.
Palo Alto: IR or ODS - A Massing Decision Made at Schematic Design
Any new second story addition to an existing one-story home in Palo Alto triggers review. Since February 2025, there are two paths: comply with all Two-Story Objective Design Standards for ministerial approval, or go through Individual Review. The choice between them isn't procedural - it's a design decision that shapes the massing from the first sketch. IR evaluates block-face compatibility, which means the second floor's relationship to the neighboring homes on that specific street is a primary design variable. ODS is more measurable and predictable but requires designing to specific criteria from schematic design. We make the path recommendation before full design development begins, because the choice shapes everything from roof form to material specification.
Los Gatos: Neighbor Strategy Before the Application
In Los Gatos, any second story addition exceeding 100 square feet triggers Architecture and Site Application review. What distinguishes Los Gatos from the other South Bay cities with complex permitting is the neighbor dynamics component: a formal written opposition from a neighbor can escalate a simpler application to full Planning Commission review, adding weeks to the schedule and introducing public hearing uncertainty that didn't exist before. We address this through design strategy before the application is filed - not as a response to opposition, but to prevent it. The design itself is shaped to minimize the conditions that typically generate objections: second-floor window placement relative to adjacent rear yards, massing at the street, privacy screening. And where appropriate, the neighbor conversation happens before the application is submitted.
The permit track is determined by what we draw in schematic week one. Not by project type. Not by lot size. By design decisions.
Permit Track at a Glance
We establish which track a project is in before schematic design advances past the first sketch. In Cupertino, we test the 66% second-to-first floor ratio and the 10-15 foot side setback simultaneously - both trigger Design Review independently. In Los Gatos, we test the 100 sqft second-floor threshold and the 50% footprint expansion threshold before the program is set. In Saratoga, we evaluate ODS compliance to determine which of three Design Review paths applies. In Palo Alto, we make the IR vs. ODS path recommendation at schematic design because it determines the massing strategy. San Jose and Sunnyvale use standard building permits with design guidelines - faster tracks, fewer constraints, but the compliance analysis still happens first.
Cupertino: Two-Story Permit or Residential Design Review → Cupertino residential permitting + design review
Los Gatos: A&S Application for additions over 100 sqft → Los Gatos architecture approval process
Saratoga: Design Review required for most significant residential work → Saratoga residential design review system
Palo Alto: Individual Review or Objective Design Standards (ODS) ministerial path → Palo Alto objective design standards + review process
San Jose: Standard Building Permit process → San Jose residential permitting process
Sunnyvale: Standard Building Permit with design guidelines → Sunnyvale residential permitting + design guidelines
What We See Go Wrong
The failure modes on South Bay second story addition projects follow identifiable patterns - specific to each city's review process, each housing era's construction characteristics, and each neighborhood's site conditions. What they share: they're all significantly more expensive the later in the process they surface. And every one of them is identifiable before design begins. That's the part most homeowners find surprising.
The Cupertino Ratio Calculation That Gets Missed
What we typically see on Cupertino second story projects that run into permit trouble is straightforward: the 66% ratio wasn't calculated before design was committed, or the second-floor side setback wasn't measured against the 10-15 foot trigger. The project is submitted under the Two-Story Permit track. Cupertino Planning staff catches it at plan check. The application gets rejected. The project either redesigns to qualify for the Two-Story Permit track, or starts a full Residential Design Review application from scratch - adding 4-8 weeks and additional professional fees. If the homeowner had already committed to a contractor start date, which is common by the time a permit application is filed, the contractual penalties compound the delay.
Both triggers are calculations we run before the first floor plan sketch is drawn. A contractor or drafting service isn't positioned to run them because they're not in the design process at that stage - these are architectural calculations that require understanding the R-1 ordinance and how it applies to this specific lot. Cupertino's Building Division currently posts average initial review timelines of 20-30 business days per cycle. Missing the permit track on first submittal means waiting through at least one full additional cycle before the corrected application even begins review.
The Protected Tree That Reshapes the Site Plan
Site planning begins in Saratoga. We've established the setbacks, we've done the FAR calculation, and the footprint looks workable on paper. The arborist report is initiated after site planning is done - or worse, not until a planning review flags it. The survey comes back. A protected valley oak on the adjacent property has a canopy dripline that extends into the proposed construction zone. The entire site plan has to be redrawn from the canopy dripline map.
Saratoga requires an arborist report whenever construction is proposed within five feet of any protected tree's canopy dripline, including trees on neighboring properties - confirmed in the city's Technical Review Submittal Checklist and in its arborist FAQ (updated March 2026). The arborist report is incorporated into the building plan set as the Tree Preservation Plan and is required with the planning application. On a Saratoga hillside lot with significant valley oak canopy, a conflict discovered at submittal represents $15,000-$30,000 in design work that produces nothing toward the final project. We initiate the arborist engagement before the first site planning session. The canopy dripline map becomes part of the site plan base from day one - the footprint is established around the trees, not placed and then adjusted to accommodate them.
The Palo Alto Second Floor That Reads Wrong on the Block
A second story addition in Palo Alto's Barron Park neighborhood is designed from the inside out. The interior program comes first: four bedrooms, two bathrooms, a bonus room. The exterior massing follows from those interior decisions - the second floor fills the envelope that the program requires. At Individual Review, the planning staff determination is that the second-floor mass, particularly its relationship to the adjacent single-story home on the street, is inconsistent with the block-face pattern. A redesign is required before approval can be granted.
Palo Alto's Individual Review evaluates block-face compatibility as its central finding. That's a qualitative judgment made by staff who have reviewed multiple IR applications on comparable streets in the same neighborhood - they know what Barron Park reads like from the street, and they know when a second floor doesn't fit it. The moment this judgment matters is schematic design, not IR submittal. An architect who treats exterior massing as a derivative of interior decisions is designing in the wrong sequence - and the correction, at IR submittal, is a full redesign, not a comment response. Since February 2025, projects that comply with all Two-Story Objective Design Standards can elect the ODS ministerial path and avoid this compatibility review entirely - but that path choice is made at schematic design based on whether the design can be built to ODS criteria, not at submittal after the massing is fixed.
The best way to avoid these outcomes is starting with an architect who has navigated these cities.

Part II: Whole-Home Remodels
The question we get most often from homeowners planning a significant South Bay remodel isn't about design. It's about how much things are going to cost and how long it's going to take. Those two questions have a common root cause: scope that wasn't defined before design began.
In practice, most homeowners arrive at the first architect meeting with a list of improvements and no hierarchy. The kitchen, the primary suite, the family room addition, the front entry - they want all of it. When the budget forces a choice, they haven't thought through which one matters more. We build that hierarchy before the first drawing is produced, because the hierarchy is what makes the project designable within the budget. Without it, every design session is a negotiation between competing priorities that should have been resolved before design began.
The Work That Happens Before Design
Phase 0 - the work before any drawing exists - answers three questions: What do you actually need? What does your property allow? And does the financial equation work?
The must-haves versus nice-to-haves conversation sounds simple until the budget forces a choice between the kitchen expansion and the primary suite addition and the homeowner hasn't actually thought it through. We guide that conversation before design begins, because a scope decision made on paper in Phase 0 costs very little to revise. The same decision made at Construction Documents costs $5,000-$15,000. The same decision made during construction costs $20,000 or more if plan-check and permits need to be redone.
The regulatory envelope check is Phase 0's second function. Does the proposed scope exceed 50% of existing floor area in Saratoga - triggering Design Review before a room is drawn? Does it add 100 or more square feet to the second story in Los Gatos - changing the permit path entirely? We run this check before the design clock starts. Discovering permit track implications after significant design investment has been made is one of the most reliably expensive mistakes in South Bay remodeling - because at that point the choice is redesign or accept a permit process the project wasn't designed for. Both are bad options. The check itself takes an hour.
Phase 0 is the cheapest design work in the project. The alternative is making scope decisions at Construction Documents, where every change costs 10-20x more.
Why the Cost of Changing Your Mind Multiplies at Every Phase
Every remodel contains decisions that can be made at any stage. What changes dramatically is what those decisions cost depending on when they're made.
Schematic Design
Room locations, overall massing, configuration. Changes happen on paper with minimal invested time. This is the cheapest moment in a project to make any decision, including ones that feel minor but carry real spatial consequences downstream.
Design Development
Room dimensions are set. The structural grid is established. Window locations and sizes are determined. MEP coordination has begun. A change here affects engineering and coordination work that's already been done - typically $4,000-$8,000 per scope change, and it may affect other consultants whose work has to be updated alongside ours.
Construction Documents
Permit-ready drawings. Complete structural, architectural, MEP, and energy compliance documents. A change here requires revising coordinated documents across multiple disciplines and may trigger plan check resubmittal - adding weeks to the schedule on top of $5,000-$15,000 in design costs.
During Construction
Contractor change orders, framing modifications, subcontractor re-mobilization, potential permit revisions. Changes that cost $2,000 in design cost $20,000 or more in construction. This is not a hypothetical - it's the most common mechanism by which South Bay remodels run significantly over budget. The scope conversation that wasn't had in Phase 0 gets had in month four of construction, at ten times the cost, with a contractor on the clock and subcontractors waiting for direction.
Architect fees are the cost-control mechanism in a remodel project, not the expensive part of the budget. The firms that argue architect fees inflate project costs have the causation backwards - projects that skip the design investment transfer those decisions to the contractor in change orders, where the unit cost is an order of magnitude higher and there's no independent professional reviewing whether the charge is warranted.
The scope conversation that wasn't had in Phase 0 gets had in month four of construction. At ten times the cost.
What South Bay Housing Stock Actually Contains
The South Bay's housing stock divides into distinct construction eras, each with characteristic conditions that affect cost and timeline in ways that aren't visible from the street. An architect who works regularly in these neighborhoods identifies likely conditions in Phase 0 and builds them into the contingency. The alternative is discovering them during demolition.
Ranch Homes from the 1950s Through the 1980s
This era dominates Cupertino, Sunnyvale, Campbell, and Mountain View, and when we walk through one of these houses for the first time we already know the list of things we're going to find. Post-and-pier foundations without cripple wall bracing - almost universal in this era. Acoustic ceiling texture containing asbestos - standard through the 1970s, present in the majority of pre-1980 homes. No plywood sheathing in the wall framing, which means adding a second floor means introducing a lateral system from scratch. Aluminum wiring in homes from 1965-1975, which means CO/ALR-rated devices throughout or rewiring affected circuits. We treat these as assumptions to verify rather than possibilities to consider, because in 20 years of South Bay practice, they've been the rule, not the exception.
What this means in practice: when a homeowner from this era of Cupertino housing asks us how much a second story addition is going to cost, the honest answer includes all of this before we get to the framing or the finish work. Abatement alone - textured ceiling removal, floor tile adhesive - adds $5,000-$20,000 and 2-4 weeks. Foundation reinforcement adds $5,000-$20,000 more. The contractor bid the homeowner gets doesn't include any of it, because the contractor prices what's on the drawings, and the drawings haven't addressed what's inside the existing structure. We address it before the drawings as these conditions are discovered that might need to be added to the construction scope.
Recommended contingency for this era: 20% of hard construction cost.
Pre-War Construction in Los Gatos, Willow Glen, and Palo Alto's Historic Districts
Craftsman and Victorian-era homes in these neighborhoods share a different set of conditions. Lathe-and-plaster wall and ceiling surfaces are far more labor-intensive to modify than drywall - matching existing plaster is expensive, and replacing it requires a finish decision that affects both budget and the character of the space. Knob-and-tube wiring is nearly universal in pre-war construction and is typically incompatible with modern circuit loads and spray foam insulation. Balloon framing without modern structural connectors means loads transfer differently than in post-1990 construction, requiring structural review of connection details before any modification.
Recommended contingency for pre-war homes: 25% of hard construction cost.
Post-1985 Construction
Homes built after 1985 benefit from seismic provisions introduced following the 1971 Sylmar and 1989 Loma Prieta earthquakes. Structural connections are more standardized, foundation quality is higher, materials are better documented. Recommended contingency: 15%.
For Eichler homes in Palo Alto's Greenmeadow, Fairmeadow, and Charleston Meadow neighborhoods - post-and-beam construction, radiant floor heating in the slab, and single-pane glass that creates energy compliance complications - see our dedicated Eichler Addition and Remodel Guide. Sunnyvale's Fairbrae tract has one of the largest Eichler concentrations in the Bay Area - the same structural constraints apply, with the additional consideration that second-story additions on Sunnyvale Eichlers require resolving how the new mass relates to the flat roofline that defines the design language. Interior reconfiguration and rear additions preserve Eichler character more reliably than vertical additions on these properties.
Palo Alto Eichler context → additions and remodel constraints
Sunnyvale Eichler context → Sunnyvale Eichler overview
The conditions inside the walls determine whether the budget the homeowner planned is the budget the project costs.
Title 24 and the Code Transition Risk
California's Title 24 energy code updates on a triennial cycle. The 2025 code cycle took effect in 2026, tightening insulation requirements, window performance standards, and heat pump requirements. The risk most project timelines don't account for: the code in effect at permit submission governs the project, not the code in effect when design began.
A remodel designed under 2022 standards and submitted after January 2026 must comply with 2025 requirements. If the energy compliance package didn't anticipate the transition, revision adds $1,500-$4,000 and several weeks before the permit can advance. In Saratoga and Los Gatos, where Design Review adds 8-16 weeks to the planning timeline, a project submitted in late 2025 may not reach building permit until mid-2026. Design Review and Title 24 compliance have to be coordinated across the full permitting arc from the start - treating them as sequential rather than parallel processes is how projects get caught by a code transition they had months to plan for.
Why Construction Administration Is Not Optional
Construction Administration is the phase that runs concurrently with construction. It's the mechanism by which the design that was permitted is the design that gets built.
What CA involves in practice: site visits at structural milestones, response to contractor Requests for Information, review of shop drawings and submittals, and evaluation of change orders before the homeowner signs them. What it catches: contractors who substitute specified materials when no one is on site to check deliveries; framing crews who simplify structural details in ways that deviate from the drawings; MEP rough-in that doesn't match the approved plans and will conflict with finish work. These deviations are typically invisible to the homeowner at the time they occur.
A CA site visit at rough framing costs $500-$1,500 in architect time. A framing error discovered at final inspection - requiring finished surfaces to be opened, re-framed, re-insulated, and re-finished - costs $10,000-$40,000. In Cupertino, Los Gatos, Saratoga, and Palo Alto, deviations from approved plans may also require amendment applications that add months to close-out. For projects that went through discretionary design review, the approved plans are legal documents. CA is the mechanism that confirms the legal document is what gets built.
CA is not optional on these projects. It is the mechanism that confirms the permitted design is the design that gets built.
Opening Up a 1960s Ranch: What the Spatial Transformation Actually Involves
The most common remodel request we get in Cupertino, Sunnyvale, and Mountain View is some version of the same thing: the house was built in 1962, the kitchen is closed off from everything, the living room and dining room are separate boxes, and the family wants to open it all up. They've seen it done. They want to know what it actually takes.
The answer almost always starts with which walls are bearing and which aren't. In a typical South Bay ranch from this era, the exterior walls and certain interior walls carry the roof load. Removing a wall that's bearing - say, the wall between the kitchen and the family room - requires replacing its load path with a beam. The beam spans the opening, carries the load the wall was carrying, and transfers it to the foundation through new posts or columns at each end.
What this means architecturally: the beam is not just structural. Its depth determines ceiling height in the new opening. A 16-inch deep LVL beam across a 20-foot kitchen span drops the ceiling plane at that transition point - which affects lighting design, mechanical coordination above, and the visual continuity of the open space. An architect who doesn't resolve the beam depth at schematic design produces a floor plan that may not survive the structural engineer's input unchanged. We work this out before the floor plan is drawn, because the beam size comes from the span and load, and the span and load determine what the space actually looks like.
The second variable is the foundation beneath the new posts. Post-and-pier foundations common in this housing era aren't always configured to accept new point loads from posts in locations the original structure didn't anticipate. The structural engineer evaluates whether the existing foundation at the new post locations can carry the added load, or whether new footings are needed. On a typical ranch remodel, this adds $3,000-$8,000 in additional foundation work - identifiable in Phase 0, not during demolition.
The permit picture: interior reconfigurations that don't change the exterior footprint or trigger Design Review thresholds in Saratoga or Los Gatos typically go through building plan check without planning review. Standard permit, no hearing. That's the streamlined path for this type of work in the ministerial cities - San Jose, Sunnyvale, Campbell. In Saratoga and Los Gatos, if any exterior changes accompany the interior work - even changing a window - the scope has to be evaluated against A&S and Design Review triggers before any design begins.
The light transformation is often bigger than the structural transformation. Ranch homes from this era have small windows sized for an era before sliding glass doors became standard. Part of what makes the open plan transformation feel complete is replacing opaque wall segments with glazing - sliding doors to the backyard, larger windows in the kitchen, a clerestory above the new beam line to bring light into the center of the plan. These are permit-required scope items that have to be planned from the first sketch.
The load path is the first design decision. The open plan follows from it, not before it.
Adding a Primary Suite: The Design and Permit Intelligence
The primary suite is the most requested addition type in the South Bay and Peninsula - and the one where the gap between what a homeowner imagines and what the property actually supports is largest. Most homeowners arrive at the first meeting with a clear program: bedroom, walk-in closet, spa bathroom, maybe a private deck or outdoor connection. The question we start with is where that program can actually go.
On a single-story ranch with lot coverage at or near maximum, the primary suite goes up - as part of a second story addition that becomes the driver of the permit track analysis. On a property with yard space and setback room, it goes out - as a ground-floor addition that avoids foundation reinforcement costs and keeps the massing profile low. The choice between those two paths is an architectural and regulatory decision made before any room is sketched.
Privacy is the governing design variable that most primary suite additions underestimate. A second-floor primary suite in Cupertino, Saratoga, or Los Gatos has windows that look into neighboring yards. In Cupertino, privacy landscaping - screening trees along lines of sight from second-floor windows to adjacent properties - is a near-universal condition of approval on Two-Story Permit and Design Review applications. In Los Gatos, second-floor windows with direct sight lines into adjacent rear yards are the most consistent source of DRC conditions, confirmed in December 2024 DRC minutes. We design window placement and orientation to the privacy review standard from schematic design, not as a response to a condition letter.
The bathroom program has structural implications that homeowners don't always anticipate. A primary bathroom with a freestanding tub, a large shower, dual vanities, and radiant floor heating has more weight, more plumbing penetrations, and more mechanical coordination than a standard bathroom. On a second story addition, the added dead load from tile, stone, and a full bathroom assembly has to be factored into the structural design of the floor system below it. We coordinate with the structural engineer on bathroom weight and wet area framing from schematic design, not during construction documents.
The indoor-outdoor connection that most primary suites aspire to - a private deck, a covered loggia, a direct connection to the garden - has permit implications in design-review cities. In Saratoga, a primary suite deck is massing that planning staff evaluates for neighborhood compatibility. In Los Gatos, a balcony or deck with sight lines into adjacent yards generates exactly the DRC conditions described above. The outdoor connection has to be designed to the privacy review standard simultaneously with the room itself.
Saratoga Design Review → massing compatibility constraints
Los Gatos DRC → privacy-driven design constraints
Privacy is not a condition of approval. It is a design constraint that belongs at schematic design week one.
Multigenerational Living: Designing the Parent Suite or Adult Child Suite
The fastest-growing project type we're seeing across the South Bay and Peninsula is the multigenerational addition: a suite for a parent moving in, or an adult child returning from college who needs genuine separation from the main household. The design brief is specific - private entry, separate sleeping and bathroom, ideally a small kitchen or kitchenette, acoustic separation from the main house. The regulatory picture is where it gets complicated.
The line between a multigenerational suite and an Accessory Dwelling Unit matters more than most homeowners realize. A suite that is internally connected to the main house and has no separate entrance from the exterior is typically treated as an addition to the primary residence - it follows standard addition permitting. A suite with a separate exterior entrance, a full kitchen, and the appearance of independent occupancy may be treated as an ADU - which has its own permitting path, its own setback and coverage standards, and its own utility connection requirements.
In Cupertino, this distinction is made by the Building Division at intake based on the submitted plans. A kitchenette with a microwave and a small refrigerator reads differently than a full kitchen with a range and a dishwasher. An interior door connecting the suite to the main house reads differently than no interior connection at all. We evaluate the program against both paths in Phase 0 and recommend which treatment fits the homeowner's intent - because the regulatory path determines the design parameters, not the other way around.
The design intelligence that distinguishes a well-executed multigenerational suite from a converted bedroom: acoustic separation, separate climate control, thoughtful circulation that gives both generations genuine privacy without feeling like a motel corridor, and an outdoor connection that doesn't put the parent's patio directly adjacent to the main household's primary outdoor space. These are spatial design problems. They're also the problems that a contractor-designed addition typically solves badly, because the spatial relationship between the suite and the main household requires architectural judgment about how the two programs coexist.
In Saratoga and Los Gatos, a multigenerational suite addition triggers Design Review if it meets any of the standard addition thresholds. The suite's exterior expression - whether it reads as an integrated part of the original house or as an addition bolted on - is a Design Review finding. We design the suite's exterior to the Saratoga or Los Gatos Design Review standard from schematic design, which means the roof form, material palette, and massing relationship to the original house are resolved before the program is established, not after.
The classification decision pivot comes up regularly. A homeowner in Cupertino wants a detached suite for a parent - private entry, separate bedroom and bathroom, a small kitchenette. They describe it as a multigenerational suite. We evaluate the program against the ADU classification criteria. The separate exterior entry, the kitchenette, and the lack of interior connection to the main house all push toward ADU classification under the Building Division's intake criteria. An ADU has different setback requirements in Cupertino, different FAR treatment, and different utility connection standards than an attached addition. The homeowner's intent is the same. The regulatory treatment is different. We establish which path applies before the floor plan is drawn, because the regulatory path determines where the structure can be placed on the lot and how it has to connect to the main house.
The regulatory path determines the design parameters. Not the other way around.
Adding a Second Story Without Wrecking the House: The Massing and Proportion Problem
The fear behind almost every second story addition inquiry in the South Bay isn't really about cost or permits. It's about the house ending up looking like something was stapled to the top of it. Homeowners have seen it happen to neighbors. They don't want it to happen to them.
The stapled-on look has a specific architectural cause: the second floor was designed from the inside out. The program - bedrooms, bathrooms, closets - drove the floor plan, and the floor plan drove the massing, and the massing was never evaluated against the first floor's proportions or the street's visual pattern. The result is a second floor that sits on top of the first like a box on a box, with no visual integration between the two levels.
What actually prevents it: massing strategy established before room layout begins. The proportion relationship between the second floor and the first floor, the roof form that connects them, the window alignment between levels, and the material continuity from first to second are all decisions that shape how the addition reads from the street. These are the design variables we establish in schematic design week one - before floor plans are drawn - because they determine the envelope within which the program can work, not the other way around.
In Palo Alto, this isn't just an aesthetic question. Individual Review evaluates whether the second floor massing is compatible with the block-face streetscape - a qualitative judgment that planning staff makes based on how additions on comparable streets in the same neighborhood have been approved or denied. An architect who has navigated IR on Barron Park streets, or Midtown streets, or Squares streets, has a picture of what that judgment looks like in practice. The design we bring to schematic design reflects that knowledge.
The step-back is the most common massing tool for integrating a second story addition with a single-story ranch. Setting the second floor back from the front wall of the first floor reduces its visual mass at the street, preserves the horizontal line of the original roofline, and gives the addition a base that reads as grounded rather than perched. In Cupertino, a second-story setback of 15 feet or more from the side property line also keeps the project in the Two-Story Permit track rather than triggering Residential Design Review. The massing strategy and the permit strategy are the same decision.
The roof form decision follows from the massing strategy. A hipped roof at the second floor reduces perceived mass from the street compared to a gabled roof of equivalent volume - the slopes pull the eye away from the corners rather than toward them. In Saratoga and Los Gatos, where planning staff evaluates massing compatibility against the neighborhood roofline character, the roof form choice is also a Design Review strategy. We make it at schematic design, with the permit implications made explicit.
Palo Alto Individual Review (IR) → block-face massing compatibility constraints and design evaluation
The massing strategy and the permit strategy are the same decision. We make them simultaneously.
Creating Real Indoor-Outdoor Connection in a South Bay Home
The indoor-outdoor connection is the most aspirational design goal we hear in the South Bay and Peninsula, and the one where the gap between what homeowners have seen in magazines and what their property actually allows is most often a surprise. California climate makes it achievable. South Bay lot sizes, setbacks, and permit processes make the execution more constrained than most homeowners expect when they first describe what they want.
The move that most transforms a ranch home's relationship to the outdoors isn't adding a deck or replacing a door with a slider - it's making the indoor floor elevation match the outdoor grade. The typical 1960s South Bay ranch has a floor level 18-24 inches above finished grade, which means every door to the outside has a step down that creates a threshold, interrupts the visual connection, and prevents the furniture groupings that define real indoor-outdoor flow. When a remodel scope includes raising the outdoor patio elevation or lowering the indoor floor at the transition zone, the result is a connection that feels like what homeowners see in design publications. That scope item - the grading work, the transition detail, the potential structural implications of lowering the floor at a specific location - is an architectural decision with a permit requirement, not an afterthought.
The glazing strategy is where the spatial transformation becomes visible. Replacing a 6-foot slider with a 12-foot or 16-foot multi-panel stacking or folding door system changes the relationship between inside and outside fundamentally - not just because more wall opens up, but because the visual continuity of the floor plane, the ceiling line, and the material palette across the threshold creates a space that reads as one. This is permit-required work in every South Bay city, and in Saratoga and Los Gatos, changing exterior openings triggers Design Review threshold evaluation. We evaluate the glazing strategy against the permit thresholds before the design is developed.
Privacy governs outdoor space design in second-story additions in ways that ground-floor additions don't face. A covered outdoor space at the second-floor level - a balcony, a deck, a loggia - that faces a neighboring rear yard will generate DRC conditions in Los Gatos and privacy landscape conditions in Cupertino. The outdoor connection at the second floor has to be oriented and screened in the design, not added as a condition response. We orient outdoor spaces to views that don't create privacy conflicts - toward the street in certain configurations, toward the side yard in others, toward interior courtyards in custom designs where the site allows it.
The interior courtyard is the design solution that solves the privacy problem architecturally rather than through landscape screening alone. A remodel or custom home that wraps rooms around an interior courtyard creates full floor-to-ceiling glazing facing a private outdoor space that no neighbor has a sight line into. In Los Gatos and Saratoga, this approach generates fewer DRC conditions and Design Review complications than second-floor outdoor spaces facing adjacent properties. It's also a more elegant spatial solution. We raise it as an option when the site geometry allows it.
The indoor-outdoor connection you want starts with understanding what your site and city actually allow.
Part III: Custom Home Construction
Every few months we have a first meeting with a homeowner who has already purchased a lot and is ready to design. They've spent time thinking about the program - the square footage, the bedroom configuration, the relationship between the kitchen and the outdoor space. What they haven't done is evaluate what the lot actually supports.
The conversation that follows is the most consequential one in the project. A Saratoga hillside lot that appears to support 4,500 sqft on a standard zoning map may support 3,200 sqft once slope adjustment reduces the net FAR area, ridgeline visibility constraints narrow the buildable zone, and protected oak canopy from three neighboring properties establishes dripline exclusions across the most buildable portion of the site. The program the homeowner planned for and the program the lot can support are different programs. We establish that in Phase 0 - before design begins, before design fees are spent, before the homeowner is committed to a scope the site can't accommodate.
The program the homeowner planned for and the program the site supports are sometimes the same project. Often they're not. We establish which before design begins.
Custom Home vs. Remodel: How the Process Differs
Timeline: First Meeting to Occupancy
Custom Homes
Phase 0 → 6–10 weeks (lot due diligence, zoning, geotechnical indicators, ridgeline check, tree inventory, WUI zone)
Design → 20–32 weeks
Permitting → 8–18 weeks (Saratoga requires Design Review; Palo Alto and Los Gatos use discretionary new construction review paths)
Construction → 12–18 months
Total → 24–36 months from first meeting to occupancy
Whole-Home Remodels
Phase 0 → 4–6 weeks (existing conditions + scope definition)
Design → 16–24 weeks
Permitting → 4–16 weeks (depends on permit track triggered by scope)
Construction → 8–14 months
Total → 18–24 months from first meeting to occupancy
24-36 months from first meeting to occupancy. Most of the schedule is determined by decisions made in the first six weeks.
Why Independent Architecture Matters on Custom Projects
Custom homes in the South Bay are delivered through multiple models. Architect-led design-build firms design and build under the same entity. Independent architects produce construction documents that are bid by multiple contractors. The distinction matters most when construction change orders arrive - which they always do.
An independent architect's professional obligation runs entirely to the homeowner. The firm that designed the home also profits from building it in design-build - and when a change order arrives, when a material substitution is proposed, when value engineering pressure builds mid-construction, the conflict of interest is structural. It isn't about the firm's intentions. It's about how the model is organized. Independent construction documents also enable competitive bidding. In a South Bay market where contractor bids on custom homes in Saratoga and Los Gatos regularly span $200,000-$500,000 between the lowest and highest qualified bidder, competitive bidding is not a procedural detail.
All new construction in Saratoga requires Planning Department Design Review - regardless of scope, size, or lot location. Every new single-family home, every accessory structure over 250 square feet, and any reconstruction after full or partial demolition.
Saratoga Design Review → full residential review framework and constraints
Architect vs. design-build delivery → how project delivery models affect cost, risk, and outcomes
What We Evaluate on a Custom Home Lot Before a Sketch Is Made
Every few months we have a conversation with a homeowner who has already purchased a property and is arriving at the first meeting ready to design. The property is in Saratoga or Los Gatos, the purchase was significant, and the homeowner has a clear picture of what they want to build. The first thing we have to do is evaluate whether what they want to build is actually possible on that specific property - and sometimes the answer is that it's not, or that it requires significant adjustment to scope or program or both. That conversation is significantly harder after the purchase than before it.
The question we're answering in Phase 0 on a custom home is not whether a house can be built on this property. Almost any lot can support some structure. The question is whether the house the homeowner wants - with the square footage they need, the program they're planning, and the timeline they're working toward - can be built on this specific property within a budget that makes financial sense. Those are different questions, and the answer to the second one is often no, or not in the form you're imagining, before design begins.
On a Saratoga hillside lot, we've had that conversation with homeowners who purchased a property specifically intending to build a 5,000 sqft custom home, only to find that the ridgeline visibility restrictions, the 25% slope across most of the buildable area, and the protected oak canopy from three neighboring properties collectively left them with a buildable zone that could support perhaps 3,200 sqft if the siting was carefully managed. The property could accommodate a beautiful home. It couldn't accommodate the home they had in mind. That's a conversation that costs $5,000 in Phase 0 evaluation. It costs $200,000 in design fees and carrying costs if it's discovered at Design Review.
Zoning district and allowed uses - confirming the intended use is permitted, not conditional or prohibited
FAR limits and slope adjustments - in Saratoga, net site area is reduced for lots with average slope over 10%, which requires surveyor-measured slope before FAR analysis is meaningful
Geotechnical indicators - hillside lots in Saratoga and Los Gatos with landslide or liquefaction potential require geotechnical clearance before Design Review approval; we check the city GIS maps before design begins
Tree inventory - arborist survey before site planning prevents footprint conflicts that require complete redesigns; tree protection security deposits are required in both Saratoga and Los Gatos and must be established before building permits are issued
Ridgeline check - Saratoga's ridgeline map identifies major and minor ridgelines with height and mass restrictions that apply on top of standard zoning limits; a project that appears feasible on a standard zoning analysis can be substantially constrained once ridgeline visibility is modeled, and that analysis has to happen before the program is set
WUI and Fire Hazard Severity Zone - Saratoga and Los Gatos hillside properties face fire prevention requirements affecting exterior material specifications, structure setbacks, and emergency access
The most expensive custom home mistakes in the South Bay happen before design begins - on properties purchased without a proper site assessment, or with a program scope that the regulatory envelope can't accommodate. A Feasibility Consultation before the purchase or before design begins is the cheapest insurance available on a $2M-$15M investment.

Part IV: South Bay + Peninsula Permitting
Permitting in the South Bay divides into two fundamentally different types: cities where projects get approved when they meet code - ministerial review, no design judgment applied - and cities where projects are evaluated for design compatibility, massing, and neighborhood context on top of code compliance. Which category a project lands in is largely determined by design decisions made before any application is filed.
The detailed permitting processes - triggers, timelines, required submittals, what creates approval friction, and what the process actually looks like in practice - live on each city's residential architect page. What follows here is the architectural layer: how review type shapes design strategy, where pre-application meetings add the most value, and what permitting mistakes we see most often.
The design decisions we lock at schematic design are either an investment in a clean approval or a deferred cost that surfaces at the worst possible moment.
How to Get a Permit for a Home Addition or Remodel in the South Bay
The permit process for a South Bay home addition or remodel is not a single procedure. It depends on the city, the scope of work, and specific design decisions made before any application is submitted. What that means practically: two homeowners on the same street with the same project size can land in different permit processes - with different timelines and different cost structures - based entirely on how the project is designed.
The starting point is scope evaluation against your city's specific trigger thresholds. In Cupertino, a second story addition where the second floor exceeds 66% of the first floor triggers a different permit process than one designed below that threshold. In Saratoga, virtually all significant additions trigger Design Review - but which of three review paths applies depends on whether the design complies with the city's Objective Design Standards. In Los Gatos, a second story addition exceeding 100 square feet triggers Architecture and Site Application review. In Palo Alto, any new second story on an existing single-story home triggers review - but since February 2025, a ministerial approval path exists for projects that meet all Two-Story Objective Design Standards.
What this means for the permit application: the permit application you submit is shaped by design decisions made weeks or months before you submit it. Discovering at plan check that the project triggers a more complex permit track than anticipated means redesigning or restarting - and in cities like Cupertino running 20-30 business days per review cycle, that delay is real money. We evaluate the permit track implications before design begins, design to the right track from the first sketch, and prepare complete submittals against each city's specific checklist.
The step-by-step permit process for a South Bay home addition:
Phase 0: Confirm the permit track - which process applies to this scope in this city
Schematic design: Design to the permit track thresholds, not against the code maximum
Design development and construction documents: Prepare permit-ready drawings including structural, architectural, MEP, and energy compliance
Submittal: File the complete application with all required documents per city checklist
Plan check: City staff reviews for code compliance; corrections returned if incomplete or non-compliant
Approval: Permit issued when all corrections are resolved and all review findings are met
Construction: Permitted work begins; inspections at structural milestones
Final inspection and certificate of occupancy: Project closes out
In design-review cities - Saratoga, Los Gatos, Palo Alto IR, Cupertino Residential Design Review - the planning approval step precedes the building permit application. Design Review findings have to be satisfied, conditions of approval recorded, and any required story poles installed and approved before the building permit can be issued. This is the planning review, not the building permit review - two sequential processes with different requirements and different timelines.
Cupertino → two-story permit path and residential design review triggers
Los Gatos → architecture and site review process and neighbor-driven constraints
Saratoga → design review framework and massing compatibility standards
Palo Alto → individual review vs. objective design standards path
The Three Review Types
Ministerial Review
Approved when the application meets all code requirements. Staff applies the code without design judgment. No hearing, no discretionary findings. Examples: standard building permit in San Jose and Sunnyvale; Cupertino Two-Story Permit for projects meeting all R-1 design standards; Saratoga Path 1 for projects complying with all Objective Design Standards. Typical timeline: 4-8 weeks from complete submittal.
Administrative Discretionary Review
Planning staff applies design judgment alongside code compliance. The project must satisfy review findings - compatibility with neighborhood character, harmonious scale, visual impact mitigation. Staff approves without a public hearing in most cases. Examples: Cupertino Residential Design Review; Saratoga Path 2; Palo Alto Individual Review. Typical timeline: 6-12 weeks from complete submittal.
Discretionary Review with Public Hearing
A Planning Commission or Design Review Board holds a public hearing. Neighbors can testify. Conditions of approval are common. Examples: Los Gatos A&S Application; Saratoga Path 3; complex Palo Alto IR cases. Typical timeline: 8-16 weeks of planning review. The difference between landing here versus in a faster track is often a design decision made in schematic week one.
The permit track a project lands in is not fixed by project type. It's determined by what we draw in the first two weeks.
The difference between a six-week permit and a sixteen-week one is usually a design decision made in schematic week one.
City Permitting: Where to Get the Full Detail
Each city's dedicated residential architect page covers the complete process - triggers, timelines, submittal requirements, what generates approval friction, and what the process looks like in practice. Below is orientation-level context.
Cupertino → Two-Story Permit or Residential Design Review
Los Gatos → Architecture and Site Application, DRC and Technical Review
Saratoga → three Design Review paths, story poles for Path 3, pre-submittal neighbor notification on all paths
Palo Alto → Individual Review or February 2025 ODS ministerial path
San Jose → Standard Building Permit, multi-district zoning considerations
Sunnyvale → design guidelines apply, 35% second-floor ratio consideration
Campbell → Building Division process, new structure determination threshold
Mountain View → daylight plane shapes second-story design from the first sketch
When Pre-Application Meetings Are Worth It
A pre-application meeting with city planning staff is most valuable on projects near permit track thresholds, on hillside lots, and on sites with significant tree canopy or geotechnical conditions - any situation where a design direction is being considered that could require adjustment after a formal submittal.
In Saratoga, a pre-application conversation on ridge-adjacent lots or properties with significant oak canopy gives staff the opportunity to indicate whether the proposed scope and massing are likely to meet Design Review findings before application fees are paid. In Los Gatos, informal pre-submittal conversations on projects near A&S thresholds can surface neighbor concerns before they become formal opposition. In Palo Alto, the IR Preliminary Review Meeting is a formal paid option conducted through Online Permitting Services - non-binding, but staff comments at that stage redirect design when changes are still inexpensive. In Cupertino, informal pre-application conversations are available for projects near the Design Review threshold.
What to bring: preliminary site plan, proposed program, and specific questions about constraints. Preliminary drawings, not completed design development. The purpose is to confirm direction before committing to it.
One thing worth knowing about Saratoga pre-application meetings: planning staff will tell you whether the general scope and massing direction is likely to meet Design Review findings, but they won't tell you which ODS criteria you're failing or how to fix them. That analytical work is the architect's job. The pre-application meeting confirms whether the direction is viable. The architect figures out how to make it work within that direction. Coming in without an architect means coming in without the ability to respond to staff's feedback in real time.
Pre-application meetings confirm direction before it's committed to. The alternative is discovering the problem at plan check.
The Permitting Mistakes That Cost the Most Time
What we see most consistently across Cupertino, Los Gatos, Saratoga, and Palo Alto is a small set of repeating mistakes. Each is preventable. Each is significantly more expensive than the work that would have prevented it.
Incomplete submittals are the leading cause of preventable delay. In all four cities, plan check staff return incomplete applications with a correction letter rather than beginning review. The application stops until resubmittal. Each correction cycle adds 20-30 business days in Cupertino's current processing environment. We prepare submittals against each city's specific checklist, not a generic one.
Wrong permit track at design start is the most structurally expensive mistake. Designing a Cupertino second story without calculating the 66% ratio and discovering at submittal that Design Review is required means starting the permit process over. The design work completed under Two-Story Permit assumptions may not support Design Review findings. The redesign and re-submittal cost is entirely avoidable with a threshold calculation in schematic week one.
Missing arborist reports on tree-adjacent sites in Saratoga and Los Gatos. Both cities require arborist review within five feet of any protected tree's canopy dripline, including trees on neighboring properties - confirmed in Saratoga's Technical Review Submittal Checklist and Los Gatos Town Code. Applications submitted without the arborist report are incomplete. We initiate the arborist engagement before submittal preparation begins.
Skipping the geotechnical hazard map on hillside sites in Saratoga and Los Gatos. Properties in mapped geologic and geotechnical hazard areas require geotechnical clearance before Design Review approval. A project that reaches final Design Review stages and then pauses for geotechnical clearance loses months. We run the GIS check before design begins.

Construction Cost by Project Type
The ranges below reflect 2025–2026 hard construction costs across South Bay and Peninsula residential projects.
Most projects ultimately land 20–35 percent above these ranges once design, permitting, engineering, and contingency are fully resolved.
These are feasibility-level ranges used to understand project scale before design begins, not final bid pricing.
Cost variation is driven less by geography and more by constraint intensity. Structural conditions, site complexity, and permitting influence on design resolution are the primary drivers.
Second Story Additions
$325–$475/sqft → lower constraint sites with simpler structural conditions and lighter review influence
$375–$525/sqft → moderate constraint residential sites with partial design review or zoning influence
$450–$600/sqft → high constraint environments where discretionary review and structural reinforcement shape design early
Whole-Home Remodels
Mid-range remodels
→ $200–$325/sqft (lighter structural intervention, stable housing stock)
→ $250–$375/sqft (moderate reconfiguration with older systems and partial structural updates)
→ $275–$425/sqft (full interior and systems rework where structure and permitting begin shaping layout decisions)
Gut renovations
→ $325–$425/sqft (baseline full system replacement)
→ $375–$500/sqft (older housing stock requiring structural correction or full modernization)
→ $425–$550/sqft (projects where scope, structure, and permitting are tightly coupled)
Custom Homes
$425–$575/sqft → lower constraint sites with straightforward grading, access, and permitting
$475–$625/sqft → standard suburban conditions typical of Cupertino-type lots
$525–$700/sqft → higher constraint or review-influenced design environments such as Palo Alto and Los Gatos
$575–$750/sqft → hillside or discretionary review heavy sites, most commonly Saratoga and complex terrain conditions
Why these ranges matter
These ranges are not city pricing tiers.
They are constraint bands.
In practice, projects move up or down within these ranges based on how much is resolved before construction begins.
Three forces determine placement:
structural intervention required by existing or proposed conditions
site constraints including slope, soil, trees, and access
permitting and review influence on massing, layout, and design resolution
As more decisions are pushed into design and review phases, construction efficiency decreases and projects move toward the higher end of the range.
How design decisions affect construction cost before pricing
These decisions occur in schematic design, long before a contractor sees the project. They typically move cost in $5,000 to $40,000 increments, but more importantly they define the construction logic that later pricing is based on.
Roof form is one example. A hipped roof introduces additional framing complexity at every intersection. On second story additions in constrained jurisdictions, that complexity often aligns with how massing is evaluated in design review, making it both a structural and regulatory decision.
Structural spans are another. Removing interior supports in open-plan spaces changes beam strategy immediately. Engineered beams or steel members replace conventional framing, and that decision is locked early because it defines ceiling height, spatial layout, and mechanical routing.
Permit path selection also carries cost implications. In lower constraint environments, staying within ministerial thresholds can reduce review time by weeks. At typical Bay Area carrying costs, that time difference becomes meaningful before construction begins.
Timeline: First Meeting to Move-In
• Phase 0: Feasibility and Site Assessment: 4–6 weeks
Includes zoning review, structural feasibility indicators, geotechnical signals, arborist considerations, and permit path identification. Often overlaps with early schematic testing.
• Phases 1-3: Schematic Design through Construction Documents: 16-24 weeks for remodels and additions, 20–32 weeks for new construction
Duration depends on how many constraints are resolved during design versus earlier feasibility.
• Permitting – Ministerial: 4-14 weeks
San Jose, Sunnyvale, and select streamlined residential paths
• Permitting – Administrative Discretionary: 6-12 weeks
Cupertino Residential Design Review, Saratoga intermediate paths, Palo Alto Individual Review
• Permitting – Planning Commission: 10-18 weeks
Los Gatos A&S applications, Saratoga high review paths, complex Palo Alto IR cases
• Construction – Addition or Remodel: 8-14 months
• Construction – Custom New Home: 12-18 months
Total Project Timeline
• Remodel or Addition: 18-26 months from first meeting to occupancy
• Custom New Home: 24-36 months from first meeting to occupancy
Why this matters
Most budget and timeline assumptions are formed before design begins, but based on contractor-level thinking.
In practice, cost and duration are shaped earlier, during feasibility and schematic design, when structure, permitting path, and site constraints are still flexible.
Once those decisions lock, the project stops being flexible in both cost and schedule.
Frequently Asked Questions
How much does a second story addition cost in Cupertino in 2025?
Second story additions in Cupertino typically fall in the $350 to $500 per square foot range in 2025 to 2026 hard construction costs. On an 800 to 1,000 sqft addition, that is roughly $350,000 to $500,000 in construction before soft costs and finishes.
What matters more than the range is the permit track. When a project moves from the Two-Story Permit path into Residential Design Review, the schedule and cost structure both shift because design stays fluid longer and iterations increase.
→ Residential Architect Cupertino (Two-Story Permit and Design Review)
Decision lens: Cost is driven by how early design becomes fixed under permit constraints.
How much does a second story addition cost in Saratoga?
Saratoga second story additions typically land between $400 to $575 per square foot in hard construction costs.
The premium reflects constraint conditions rather than geography. Design Review timelines, material expectations, limited contractor supply for hillside sites, and tree protection requirements all shape project cost before construction begins.
→ Residential Architect Saratoga (Design Review and permitting framework)
Decision lens: Cost reflects constraint density, not location.
What is the Two-Story Permit in Cupertino and when does it apply?
The Two-Story Permit is Cupertino’s ministerial review path for compliant second story additions under R-1 standards. It applies when thresholds are met, including a second floor under 66 percent of the first floor area and side setbacks outside the 10 to 15 foot trigger zone.
Once those thresholds are exceeded, the project shifts into Residential Design Review, which changes both timeline and design flexibility.
→ Residential Architect Cupertino (Two-Story Permit and Design Review)
Decision lens: Permitting defines what form is allowed before design is finalized.
What triggers Architecture and Site Review in Los Gatos?
A&S Review is triggered when a project crosses defined change thresholds such as second story additions over 100 sqft, footprint increases over 50 percent, basement expansions, setback reductions, demolition rebuilds, or larger accessory structures.
Neighbor opposition can also escalate review to Planning Commission level.
→ Residential Architect Los Gatos (A&S Review process and constraints)
Decision lens: Approval path is part of the design environment.
How long does a home addition take from start to finish in the South Bay?
Most additions and remodels take 18 to 26 months from first meeting to occupancy. Custom homes take 24 to 36 months.
The timeline is primarily determined before construction, during feasibility and schematic design, when permit path and structural decisions are still flexible.
Decision lens: Timeline is determined before construction begins.
Do I need an architect for a second story addition in Cupertino or Palo Alto?
Yes, in practical terms. Both jurisdictions require stamped structural drawings and design level decisions that affect permit approval.
The deeper requirement is not documentation, but threshold navigation. Cupertino relies on ratio rules and permit paths. Palo Alto relies on massing compatibility and objective standards.
→ Residential Architect Cupertino (Two-Story Permit and Design Review)
→ Residential Architect Palo Alto (Individual Review and massing compliance)
Decision lens: Architecture is constraint navigation before design is locked.
What does construction administration include and why does it matter?
Construction administration includes site visits, RFIs, submittal review, and change order evaluation during construction.
In review-heavy jurisdictions, deviations from approved plans can trigger re-review or amendments.
Decision lens: A design only remains valid if it is actively maintained during construction.
What should I budget for pre construction professional fees in the South Bay?
Pre construction costs include architecture, structural engineering, soils reports when required, energy compliance, permit fees, and planning review fees.
Typical range is $20,000 to $60,000 plus depending on scope and jurisdiction.
Decision lens: Early investment determines what is buildable later.
Can I build a custom home in Saratoga without Design Review?
No. All new construction in Saratoga requires Design Review through the Planning Department. The review path varies, but the process is mandatory.
→ Residential Architect Saratoga (Design Review and permitting framework)
Decision lens: In discretionary jurisdictions, process defines form.
What foundation types most commonly need reinforcement for second story additions?
Most post and pier and older stem wall foundations in South Bay ranch homes require reinforcement before a second story is viable, especially in homes built between 1950 and 1985.
Scope ranges from bolting and bracing to new footing installation at load points.
Decision lens: Existing structure determines what new structure is feasible.
Is an architect worth the cost for a South Bay home addition or remodel?
The question is not whether an architect is worth it.
The real question is what happens when threshold decisions are made without architectural control in Cupertino, Saratoga, Los Gatos, and Palo Alto where ratios, review triggers, and massing constraints define feasibility before construction begins.
→ Residential Architect Feasibility and Architect Selection (Guide, Part II)
Decision lens: Architecture is constraint control before cost is locked.
Related Resources
Project Execution Guides
Property Feasibility + Architect Selection Guide → Feasibility studies, pre-purchase evaluation, hiring your architect
What Your Property Can Become - Zoning Envelope Guide → Zoning envelope, massing potential, setbacks, height limits, and expansion capacity analysis
City Residential Architect Pages
Cupertino → Two-Story Permit, Residential Design Review, design thresholds
Los Gatos → Architecture and Site Review, DRC process, hillside requirements, neighbor opposition
Saratoga → Design Review three paths, story poles, ridgeline protection, neighbor notification
Palo Alto → Individual Review, February 2025 ODS, daylight plane specifications
Additional South Bay City Pages
San Jose · Sunnyvale · Campbell · Mountain View · Los Altos · Los Altos Hills · Monte Sereno · Redwood City · Santa Clara
Peninsula City Pages
Atherton · Menlo Park · Woodside · Portola Valley · Los Altos Hills · Burlingame · Hillsborough · San Mateo · San Carlos · Belmont
Discuss Your Project
We respond within one business day to confirm a time.
Your project. Your property. Your goals. That is where we begin.